Sign in with Klarna
Last modified:
Introduction
Sign in with Klarna (SIWK) is an extension of the Klarna for WooCommerce plugin. It adds a button to the cart page and the My Account page (before login), allowing customers to sign in using Klarna with their details and preferences pre-filled.
When customer data is received from Klarna, the plugin checks whether a user with the same email address already exists in WordPress/WooCommerce. If no matching user is found, a new customer account is created. The customer is then logged in to their existing or newly created account.
Known compatibility issues
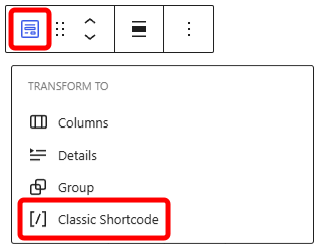
SIWK is currently not compatible with the WooCommerce Checkout block. Instead, the Classic Shortcode must be used in order for SIWK to work as expected.
Related documentation
- Klarna Docs – Sign in with Klarna
Read Klarna’s own documentation on Sign in with Klarna.
Klarna Merchant Portal
To configure Sign in with Klarna, you first need to log in to your Klarna Merchant Portal to retrieve the Client identifier needed for activation.
If you have signed up for Klarna as a payment method through your existing provider, you might need to log in through their portal or site.
- Log in to your Klarna Merchant Portal.
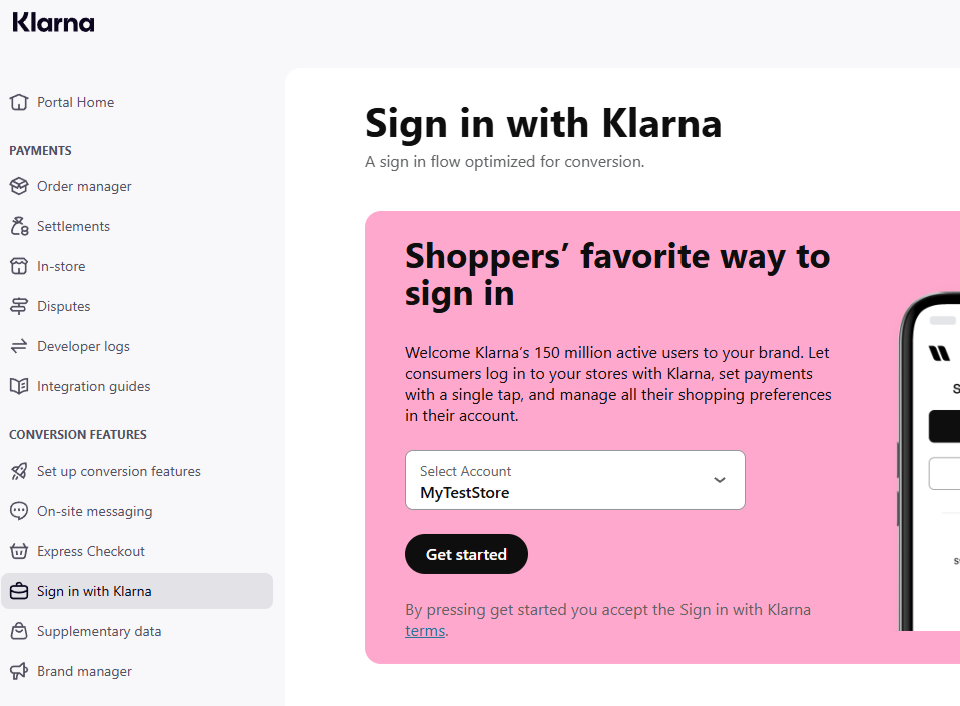
- Navigate to Conversion features → Sign in with Klarna.
- Select your store and click Get started or Manage and follow the steps.
After this, you can move on to Activation.
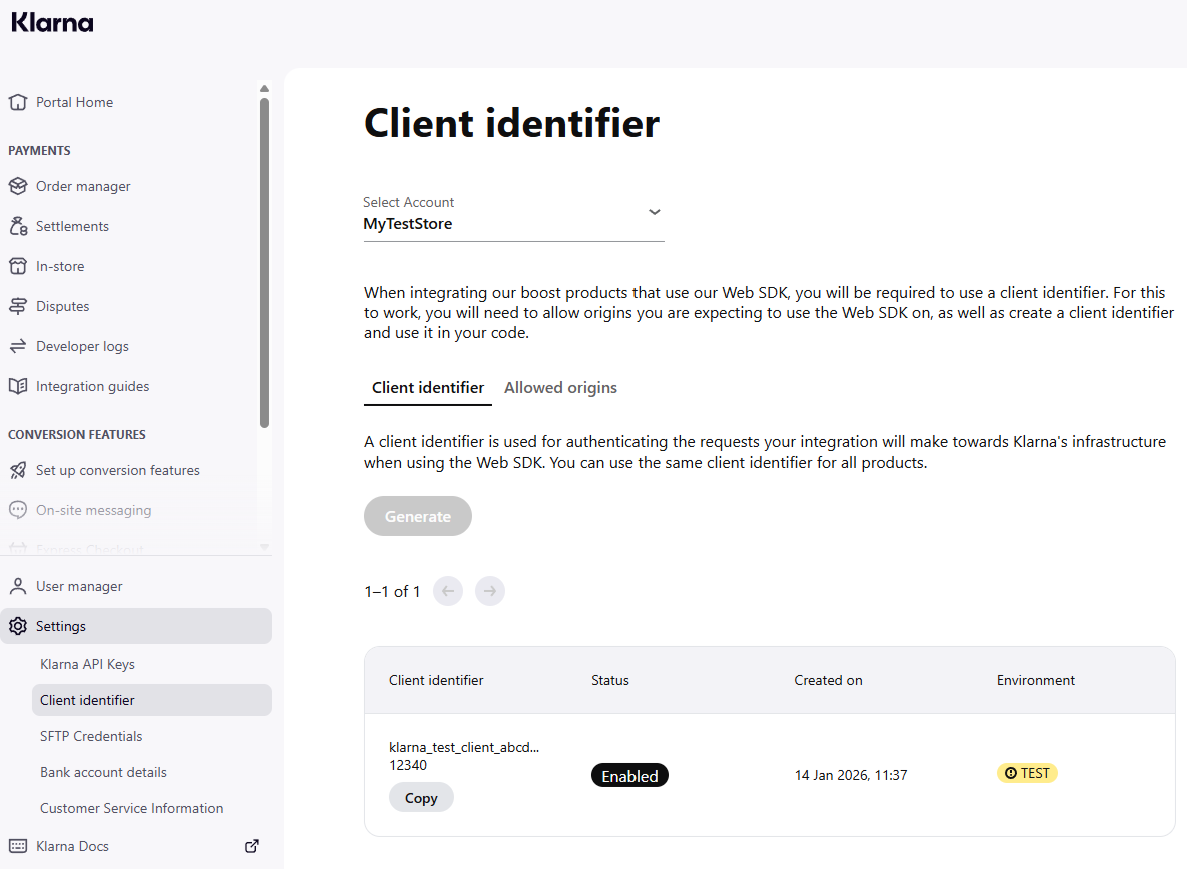
You can also access and copy your Client identifier, or generate one, by navigating to Settings → Client identifier.
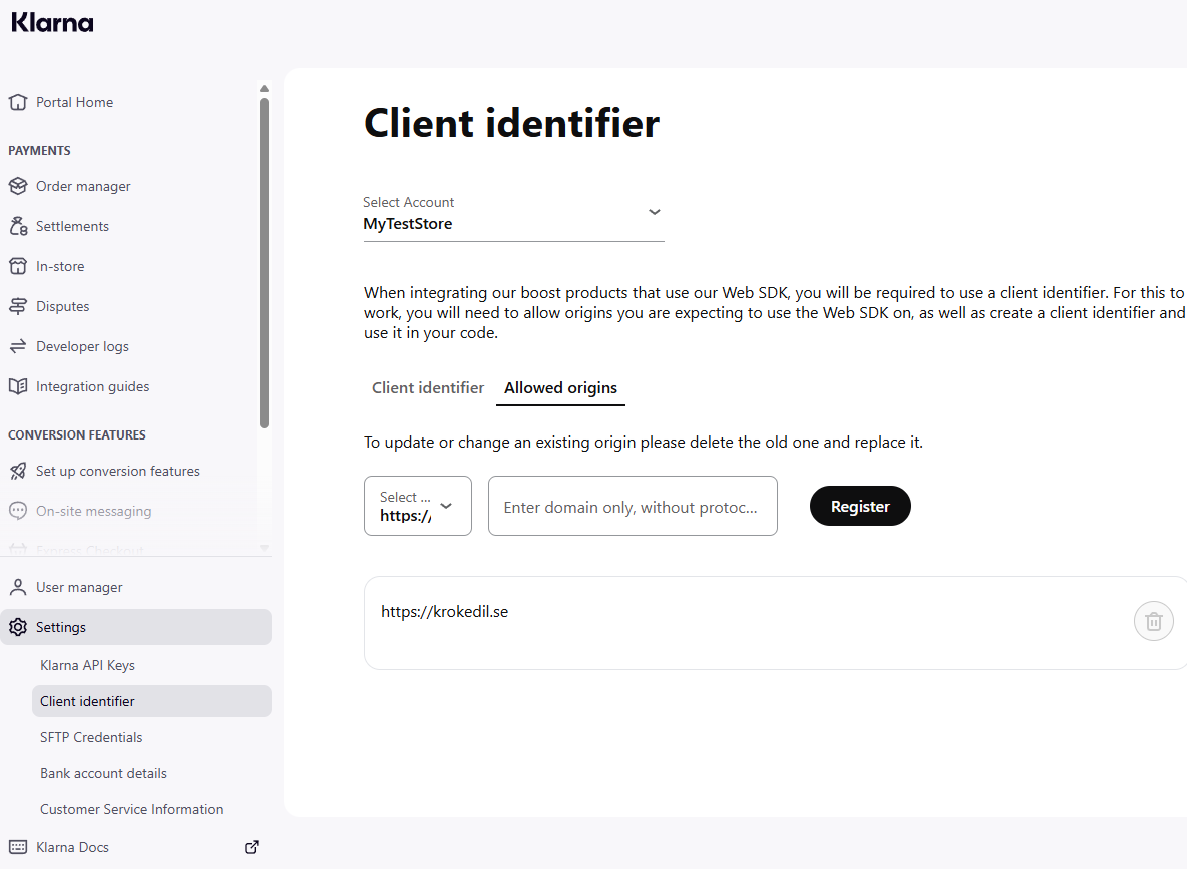
Under the Allowed origins tab, you also register the domains you are expecting to use the Web SDK on.
Activation
Navigate to WooCommerce → Settings → Payments → Klarna for WooCommerce.
Client ID – For Sign in with Klarna to work, you need to enter the Client ID in the Credentials section for Klarna for WooCommerce. This is retrieved under the Conversion features tab in your merchant portal.
Copy the Client identifier for your store and paste it in the Client ID field for the country (or region) you wish to activate under the Credentials section.
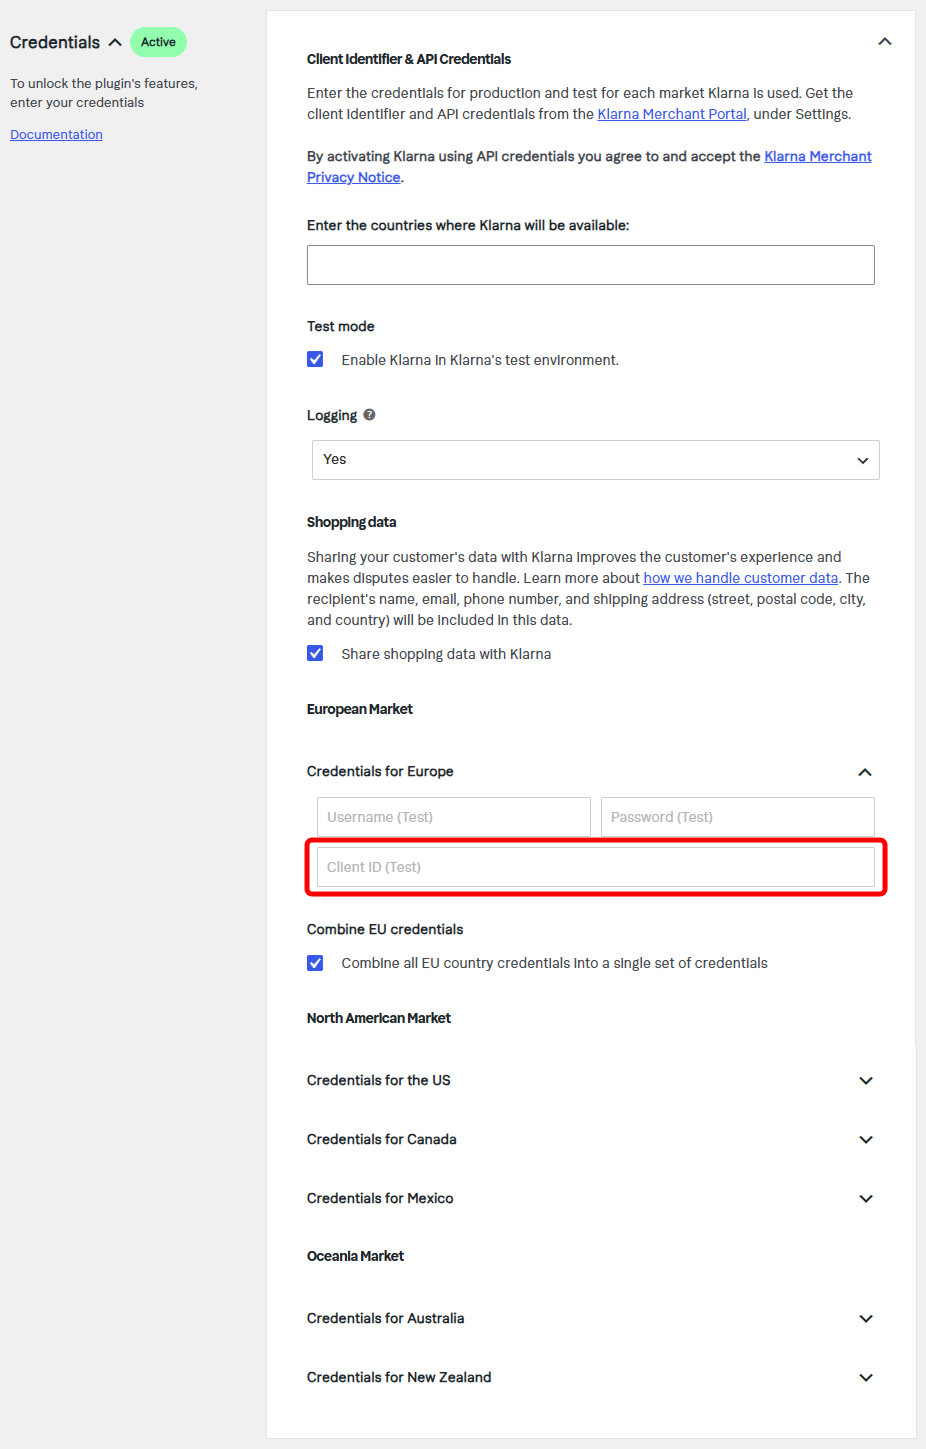
Please note that Client ID retrieved while the store is in Test mode will not work in Production mode, and vice versa.
Client ID retrieved from Conversion features → Sign in with Klarna:

Client ID retrieved from Conversion features → Settings:

Configuration
On the Klarna for WooCommerce Settings page, scroll down to the section for Sign in with Klarna to enable and configure placements and style.
- Enable/Disable – Check the Enable Sign in with Klarna box to activate.
- Redirect URL – Copy this URL and add it to your list of allowed redirect URLs in the Sign in with Klarna settings on the Klarna Merchant Portal.
- Button theme – Set the button’s color theme. Choose between Dark, Light and Outlined.
- Button shape – Set the shape of the Sign in with Klarna button. Choose between Rounded, Rectangular and Pill.
- Badge alignment – Change the alignment of the Klarna logo on the call-to-action button. Choose between Badge, Left and Centered.
- Cart page placement – Select where you want the Sign in with Klarna button to appear on the Cart page. Choose between Before “Proceed to checkout” button and After “Proceed to checkout” button.
- Required Customer Data – These scopes are included by default, as necessary for creating a WooCommerce customer account in your shop. Read more about available scopes with Sign in with Klarna here. Additional scopes can be customized if applicable – more info here.
- Request Additional Customer Data – Check the boxes of the additional customer data you wish to include.
