Creating and configuring a CargonizerConnect shipping method
Last modified:
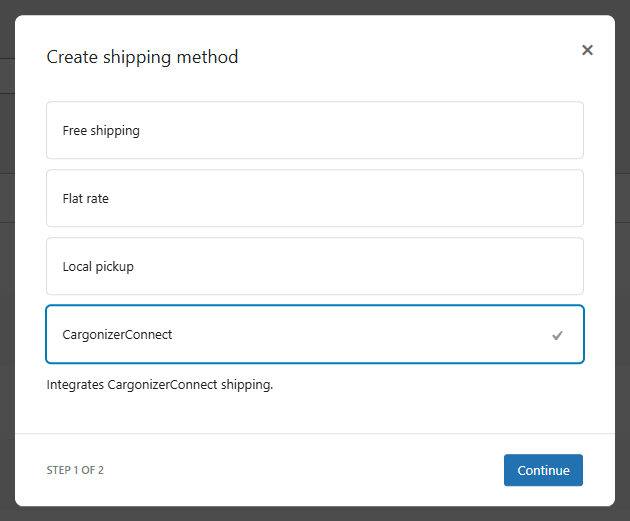
Create shipping method
- Navigate to → WooCommerce → Settings → Shipping → Shipping zones.
- Choose the Shipping zone where you want to set up a Logistra Cargonizer shipping method.
- Click Edit on the shipping method, or Add a new method, to configure the settings.
- Select CargonizerConnect and click Continue.
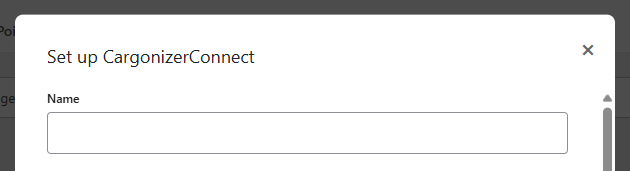
Set up CargonizerConnect
Note: Settings marked with * are not part of the default configuration and may appear depending on your other settings.
- Name – Enter a name for the shipping method. We recommend using a name that matches the service you will connect in Transport Agreement below.
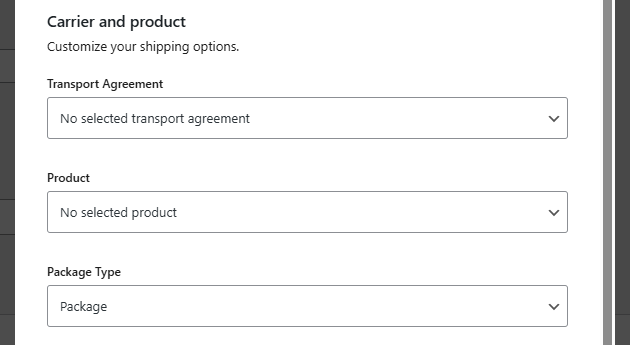
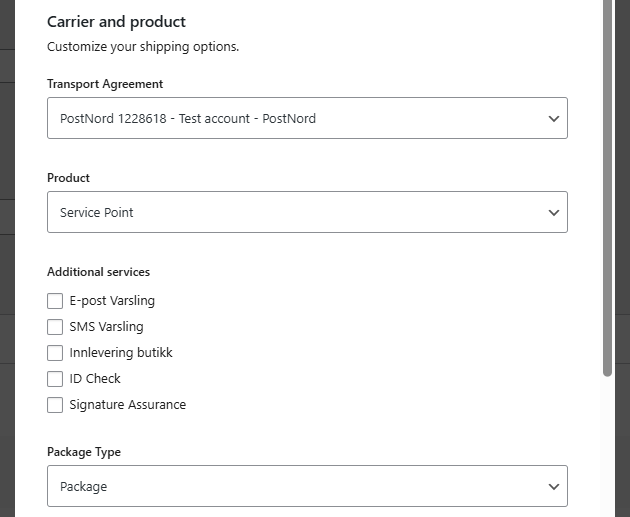
Carrier and product
Customize your shipping options.
- Transport Agreement – Select the carrier you want to configure the shipping for.
- Product – Select the Product. The available options depend on the selected Transport Agreement.
- * Additional services – Depending on the selected Product, additional services may be available, such as email notifications or ID check.
- Package type – Select the Package Type. The available options depend on the selected Product.
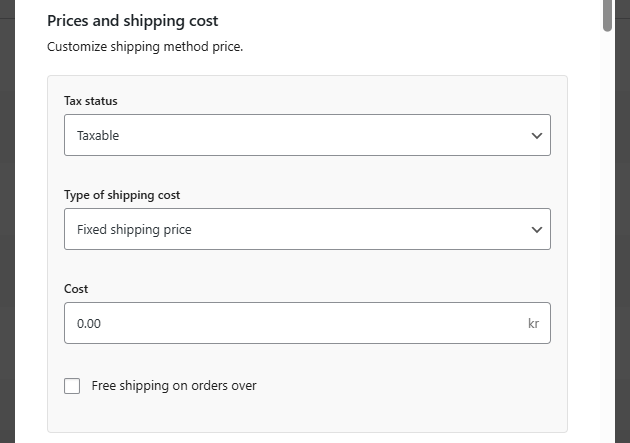
Prices and shipping cost
Customize shipping method price.
- Tax status – Choose whether the shipping cost is taxable or not.
- Type of shipping cost – Select whether the shipping cost should be a Fixed shipping price or an Estimated shipping price.
Note that the estimated shipping price is the price that is returned from Logistra for the selected shipping method. - * Shipping estimate based on – Choose whether the estimate should be based on Net price or Gross price.
- * Manual adjustment of estimated cost – Select whether to apply no adjustment, a percentage adjustment, or a fixed price adjustment.
- * Adjustment price – Enter the adjustment percentage or fixed amount, depending on the option selected above.
- * Round up to nearest 9 (including tax) – Enable this option to round the final shipping cost up to the nearest value ending in 9 (including tax).
- * Estimated price logic – Choose how to handle cases where no shipping estimate is available: hide the shipping method or use a fallback price.
- * Estimated fallback price – Enter the fallback price used when no estimate is available (if enabled above).
- Cost – Set the base cost of the shipping method, excluding tax.
- * Free shipping threshold (including tax) – Enter the order total (excluding shipping) at which free shipping should be offered.
Note: This setting is only available when the Free shipping on orders over option is enabled.

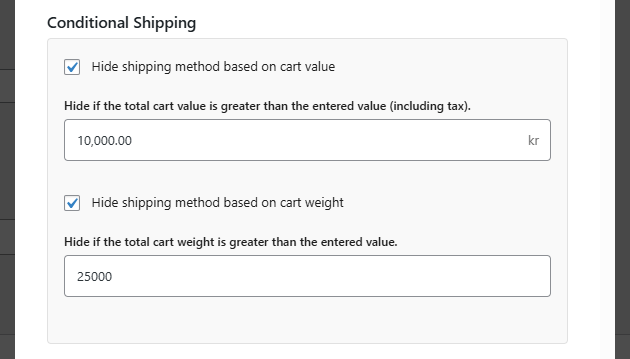
Conditional shipping
Configure rules to conditionally hide this shipping method.
- Hide shipping method based on cart value – Enable this option to hide the shipping method when the cart value exceeds a specified amount.
When enabled, the following option will appear:
Hide if the total cart value is greater than the entered value (including tax). - Hide shipping method based on cart weight – Enable this option to hide the shipping method when the total cart weight exceeds a specified limit.
When enabled, the following option will appear:
Hide if the total cart weight is greater than the entered value.

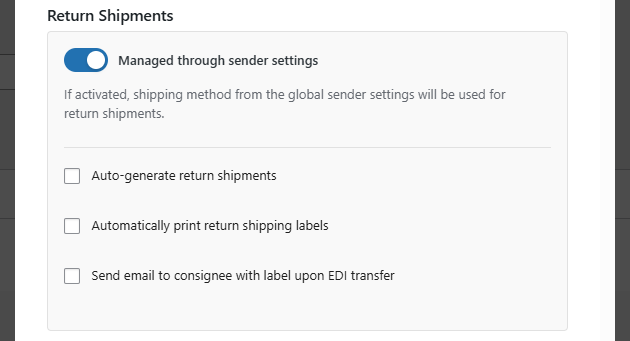
Return Shipments
Configure how return shipments should be handled for this shipping method.
By default, return shipments are managed through the global sender settings.
This is controlled by the option:
- Managed through sender settings – If enabled, the return shipping configuration defined in the global sender settings will be used. (See Sender configuration for more details.)
If this option is disabled, you can configure return shipments individually for this shipping method by selecting:
- Transport Agreement – Select the carrier for return shipments.
- Product – Select the product to use for return shipments.
(These settings work the same way as in the Carrier and product section above.)
The following additional options are available:
- Auto-generate return shipments – Automatically create return shipments.
- Automatically print return shipping labels – Print return shipping labels automatically when they are created.
- Send email to consignee with label upon EDI transfer – Send the return shipping label to the recipient via email when the shipment is transferred via EDI.

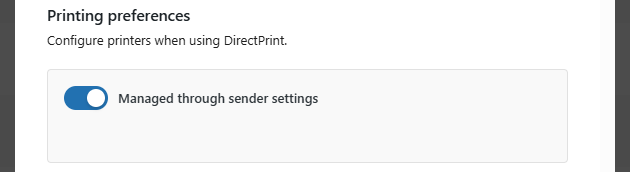
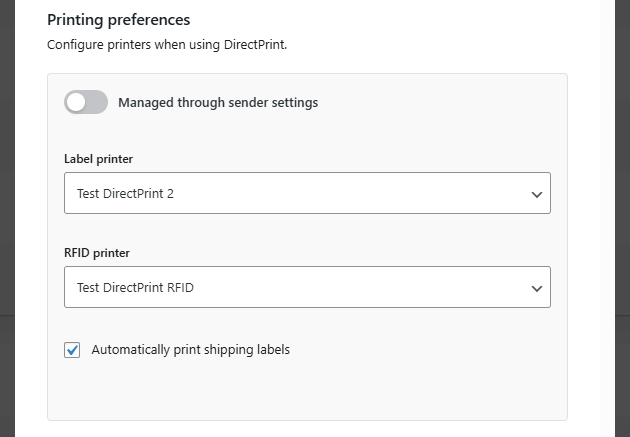
Printing preferences
Configure printers when using DirectPrint.
By default, printing settings are managed through the global sender settings.
This is controlled by the option:
- Managed through sender settings – If enabled, printer settings from the global sender configuration will be used. (See Sender configuration for more details.)
If this option is disabled, you can configure printing preferences for this shipping method:
- Label printer – Select No printer or choose one of the available printers for shipping labels.
- RFID printer – Select No printer or choose one of the available printers for RFID labels.
- Automatically print shipping labels – Enable this option to print shipping labels automatically when they are generated.
EDI transfer
Configure automated EDI transfers settings for your shipments.
By default, printing settings are managed through the global sender settings.
This is controlled by the option:
- Managed through sender settings – If enabled, EDI transfer settings from the global sender configuration will be used. (See Sender configuration for more details.)
If this option is disabled, you can configure EDI transfer preferences for this shipping method:
- Activate automatic EDI transfers in CargonizerConnect – Enable this option to automatically transfer consignments and create bookings in Cargonizer.
If disabled, consignments must be transferred manually through Cargonizer.
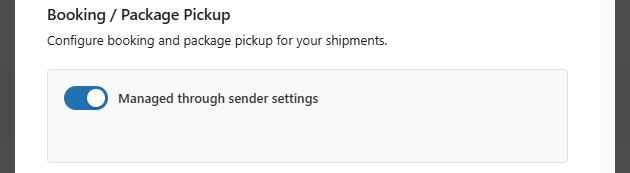
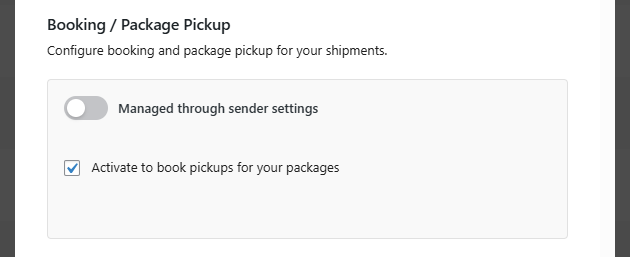
Booking / Package Pickup
Configure booking and package pickup for your shipments.
By default, printing settings are managed through the global sender settings.
This is controlled by the option:
- Managed through sender settings – If enabled, booking and package pickup settings from the global sender configuration will be used. (See Sender configuration for more details.)
If this option is disabled, you can configure booking preferences for this shipping method:
- Activate to book pickups for your packages – Enable this option to automatically book pickups for shipments created with this shipping method.
Email notification at transfer
Send the track & trace link to consignee at transfer.
By default, printing settings are managed through the global sender settings.
This is controlled by the option:
- Managed through sender settings – If enabled, email notification settings from the global sender configuration will be used. (See Sender configuration for more details.)
If this option is disabled, you can configure booking preferences for this shipping method:
- Activate email notification – Enable this option to automatically send a track & trace link to the consignee when the shipment is transferred.
Create and save
When you have made all the changes, click Create and save to complete the shipping method set up.

Please note that if you also use Klarna Checkout for WooCommerce (KCO) and have checked the box for “Shipping Methods in iframe” in your KCO settings, the “Logistra Cargonizer – Display Pickup Point Selector” will not be displayed. This is because this data is not transferred to Klarna and therefore not possible to display within the iframe.