Get started
Customization
Customize the checkout page
Walley Checkout for WooCommerce was previously known as Collector Checkout for WooCommerce and there may be some remnants of this in the documentation or plugin. For instance in the code snippets and/or some of the settings.
Introduction
Hooks in WordPress essentially allow you to change or add code without editing core files. They are used extensively throughout WordPress and WooCommerce and are very useful for developers.
Read more about action and filter hooks here:
In Walley Checkout for WooCommerce there are some action hooks available, mainly for how the checkout page should be displayed.
How and where to insert the code?
To get the functions exemplified in this section to work you need to add the code to your theme’s functions.php. You can add it as its own plugin or through the Code Snippets plugin, or something similar of your choice.
The default layouts of the checkout page
The appearance of the Walley Checkout page comes with a few set layout options:
- One column checkout
- Two column checkout (Walley Checkout in the right column)
- Two column checkout (Walley Checkout in the left column)
- Two column checkout (Walley Checkout in the left column – Storefront light)
These layouts all have the following sections displayed:
- Shopping cart delivery options.
- Customer order note.
- Select another payment method button (if offering other payment methods).
- B2C / B2B switcher (if selling to both customer types).
- Walleys checkout (where you enter personal information and choose payment method)
One column checkout

Two column checkout
Switch between the tabs to see the different layouts.


Sometimes you need to change the design of the checkout page and with Walley Checkout for WooCommerce it is possible in a couple of different ways, as presented below.
Remove, add and move with action hooks
If you want to make some more extensive changes to the layout of the checkout page, it is recommended to work with action hooks.
The checkout template file
templates/collector-checkout.php
On the Walley Checkout template page, there are several action hooks you can use to add code or content. These hooks have the following names:
collector_wc_before_checkout_formcollector_wc_before_order_reviewcollector_wc_after_order_reviewcollector_wc_before_iframecollector_wc_after_iframe
Through these action hooks, you can easily add information to different locations on the checkout page.
Create your own template file
If you need to make changes that can’t be accomplished via action hooks, then you are able to overwrite the checkout template file via your theme. The plugin supports WooCommerce’s way of handling template files.
The template file used for displaying Walley Checkout is called collector-checkout.php and it is located in the templates folder in the plugin. To overwrite the file, copy it from the plugin, then paste it into the /woocommerce folder in your theme. Now you have the opportunity to make the changes you want. Keep in mind that the action hooks collector_wc_before_checkout_form and collector_wc_after_iframe must remain for the plugin to work properly.
Filters
Custom Fields
Walley’s feature Custom Fields means that you can display your own input fields rendered inside Walley Checkout. Custom Fields are available when the new Walley API is enabled in the plugin.
Available input fields are text and checkbox. When enabled these fields will be rendered in its own section after the payment section. You can specify multiple groups that will be rendered as their own separate sections, and the name field will set the header. We recommend not to have a name present if you only have one group. Each group can contain fields.
Add Custom Fields in checkout
To enable Checkout fields, you add them via a filter called walley_custom_fields in the following way:
add_filter( 'walley_custom_fields', 'my_walley_custom_fields', 10, 2 );
function my_walley_custom_fields( $custom_fields, $order_id ) {
$custom_fields[] = array(
'id' => 'comments_group',
'name' => 'Comments',
'fields' => array(
array(
'id' => 'comments',
'name' => 'My comments',
'type' => 'Text',
'value' => 'Default value rendered in the input field',
), )
);
$custom_fields[] = array(
'id' => 'newsletter_group',
'name' => 'Newsletter',
'fields' => array(
array(
'id' => 'newsletter',
'name' => 'Sign up for our newsletter',
'type' => 'Checkbox',
'value' => false,
), )
);
return $custom_fields;
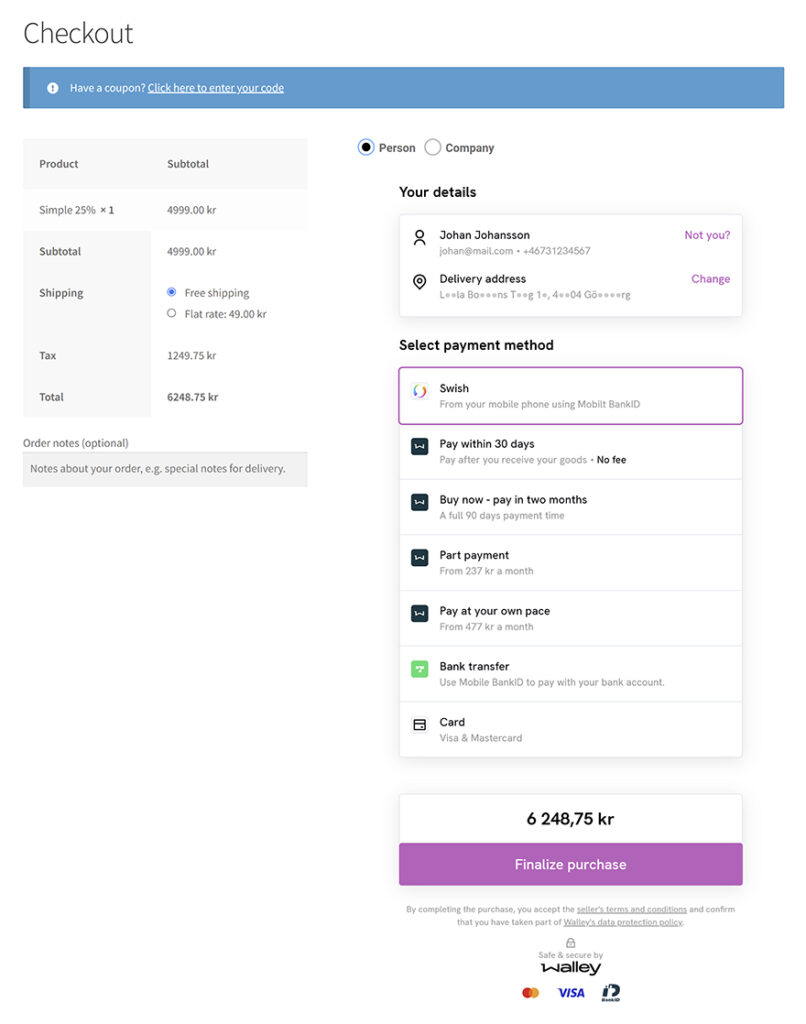
}With the example code above, the Comments and Newsletter sections is what would be added between the Select payment method and Finalize purchase button.

Save Custom Fields to order
When the order is created in WooCommerce, the customer entered data will be saved as post meta fields with the same name as the field id used in the code above. When using checkbox input fields, an unchecked field will be saved as no and a checked field will be saved as yes.